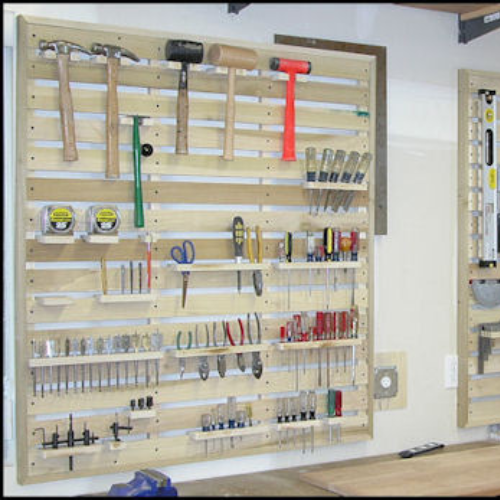
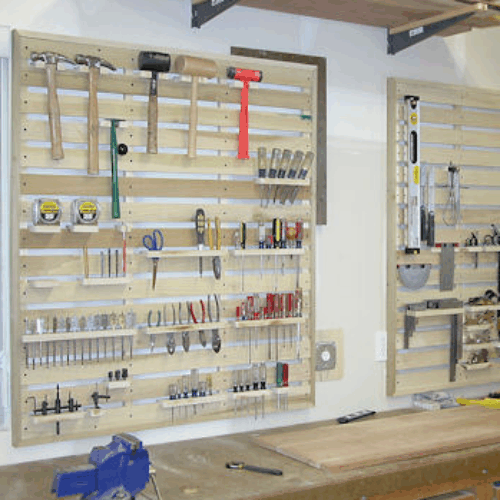
Instructions for Hand-Tool Storage Rack
Introductory Notes:
Material: Poplar is best but any wood or combination of woods can be used. Avoid woods that warp easily.
Rack Size: This plan is for a 48” x 48” tool rack.
However, the tool rack can be build to any size depending on your wall space. Vertical frame pieces can be put as far as 24” apart.
Hardware: Use #6 or similar size flat-head screws in the lengths specified in the plan below to assemble the frame.
1. Tool Rack Frame – With the horizontal frame pieces cut to size, mark each piece 16” in from both ends. Dry assemble the frame pieces (clamp together if possible) as shown in Diagram 1 with the internal frame pieces centered on the marked lines.
Drill pilot screw holes through the horizontal frames pieces and part way into the vertical frame pieces. Assemble the frame by applying glue to the joints and screwing together with 1-3/4 to 2” flathead screws.
2. Horizontal Slats – First of all, plane two spacer boards to a thickness of 13/16” and 4” to 6” in length. These will be used to space the slats on the frame so that ¾” thick tool holders will fit between the slats.
With the assembled frame squared and clamped to a flat surface, align the first slat flush with the top of the frame assembly. Drill two evenly-spaced pilot screw holes in the top slat centered on the vertical frame pieces. Fasten the slat to the frame using 1-1/4” flathead screws and glue if desired. Use the spacer boards to position the rest of the slats on the frame.
With the spacer boards in place mark the last slat flush with the bottom edge of the frame and cut to width. Drill pilot holes and fasten it to the frame.
3. Optional Steps
Tool Rack Frame – If you desire the tool rack to have a more finished look so the ends of the slats are covered, you can make a frame to fit around the outer edge of the rack using the optional frame boards shown in the Wood Dimensioning List. Miter or butt-join the corners to fit the outside of the tool rack. Drill pilot holes every 10-12” and fasten to the rack using 1” flathead screws.
Finishing – Putting a clear oil finish on the tool rack will protect it from grease i.e. dirty hand prints. However, without a finish, most dirty spots can’t be removed with light sanding. Note: Putting too heavy a finish on the tool rack and holders might cause the tool holders to not fit properly.
4. Mounting the Tool Rack – Mounting the tool rack to your shop wall will depend on your wall material. This specific plan has the rack frame built with vertical frame pieces approximately 16” on center which makes it easy to mount to a normal wall with 2×4’s 16” on center. Simply drill pilot screw holes through the rack frame and fasten it to the wall with 3” to 3-1/2” flathead screws. Mounting it to a cider block or brick wall will require the use of wall anchors.
5. Custom Tool Holders – Each tool holder should be custom made to fit your particular tools. To start, plane a 6” wide board to ¾” thickness
and dado a groove down both edges of the board about 3/8” to ½” from the edge to fit tightly over the top of the tool rack slats. Make sure it is a snug fit! The groove should be about 7/16” deep. The length of the board depends on the number of tool holders you want to make. Cut each tool holder to the desired width and length. Most tool holders can be made by simply drilling different diameter holes, cutting or mortising slots, installing dowels, or adding raised edges to the tool holder. For tools with handles such as hammers, drill the appropriated site hole and then cut the front edge away. Rounding the front corners of the tools holders will give them a more finished look. For added support for wider tool holders, a wood support strip can be screwed flush to the front edge of the bottom groove so that it rests against the horizontal slat. Examples of some tool holders with dimensions are should in Diagram #3.
1. Enjoy your custom Hand Tool Storage Rack! You will find it to be very flexible and tool holders can be made to accommodate most of your hand tool storage needs.


